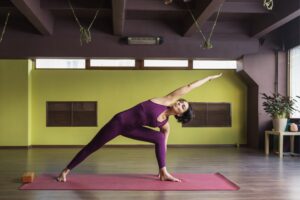
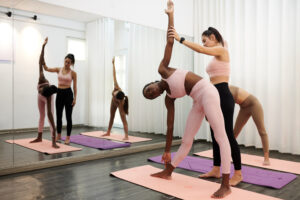
What is Triangle Pose?
The triangle pose, or Utthita Trikonasana, is fundamental in practically all yoga traditions, such as Hatha, Iyengar, and Vinyasa. The Triangle Pose is an effective stretch focusing on the hamstring, hips, groin, and chest.
The triangle pose in Hatha yoga emphasizes breath control and good alignment. It is also included in dynamic sequences in Vinyasa Yoga to increase body temperature.
In this pose, you extend your legs and form a triangle with your body by standing tall. You create a sense of openness and balance as you reach one arm up to the sky and down towards your foot. The chest can twist deeply and expand out by establishing the basis of the position.
This pose has many advantages, such as enhancing digestion, lowering stress levels, and strengthening the hips, legs, and core muscles. You can improve your general health and the body’s natural alignment by including this pose in your yoga practice.
Benefits of Triangle Pose
Builds muscle strength
It makes the main muscular groups in the body, such as the hips, legs, arms, shoulders, and core. The arms’ increased reach also stimulates the upper body. The entire body gains more strength with regular practice.
Increases flexibility
The legs, hips, and torso muscles extend and expand as we stretch in the triangle Pose. This facilitates a comprehensive range of mobility and flexibility, making daily movement easier.
Enhances digestion
The pose also incorporates twisting motions that stimulate the abdominal organs, which promotes metabolism and relieves common digestive problems. It can also aid in the relief of discomfort and bloating.
Promotes Posture and Balance
You may enhance your general alignment and balance on and off the mat by doing this position regularly.
Full body stretch
It tones the calves, hamstrings, quadriceps, and other leg muscles. It also deep stretches in the hips and releases any tightness. This pose encourages good spinal alignment and aids in the relief of back pain and stiffness.
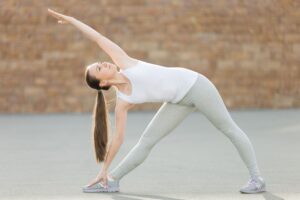
How to do the Triangle Pose correctly

- Stand at the top of your mat and place your feet hip-width apart.
- With your left foot turned slightly outward, take a large step back.
- Spread your arms apart, keeping them parallel to the ground.
- Stretch your body to the right, and bring your right hand down to meet your right foot.
- Raise your left arm and place your palm front and center.
- Breathe steadily and hold the pose for 30 seconds.
- Repeat the pose on the other side.
Variations of Triangle Pose
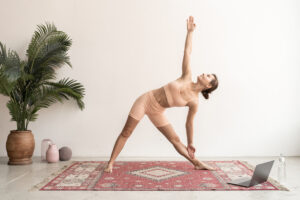
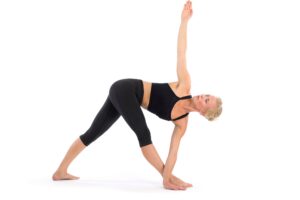
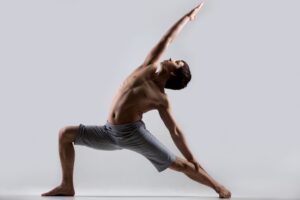
Extended Triangle Pose
This pose is a challenging version of Triangle Pose. The Extended Triangle Pose calls for increased hip flexibility, intense hamstring extension, and side abdominal muscles.
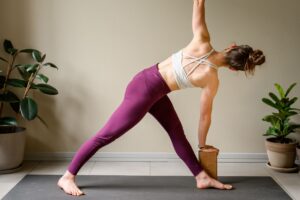
Extended Triangle Pose Block
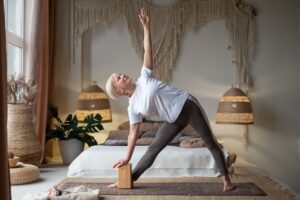
This is a version of the Extended Triangle Pose using a block. Since this position can be challenging at first, students can develop strength and endurance to perform the position without the aid of a prop.
Revolved Triangle Pose
This opens up the chest and strengthens the abdominal muscles by adding a twist to the basic triangle Pose. Start in a triangle pose, then spin your torso toward the sky while extending your upper arm overhead to execute this variant.
Revolved Triangle Pose Block
The decreased range of motion in the lower back and hips while in a twisted position makes the usual practice of this revolved standing pose difficult. Individuals can increase their endurance by opening their bodies further using a block.
Reverse Triangle Pose
Start with the basic prep for the triangle pose. Step outwards with the right foot to 90 degrees and inwards with the left foot to 45 degrees. Extend your right arm above your head and, then bring it back without bending at the elbows. Completely release your breath and lay your left hand on the back of your left knee. This pose stretches your whole back, arms, and shoulders.
Fallen Triangle Pose
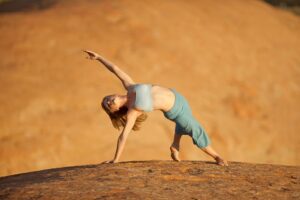
This variation is creative, dynamic, and strengthening. This stretch improves the range of motion and is useful for students with tight hips. This technique reduces myofascial pain and muscle soreness.
Triangle Pose Bent Knee
Before trying the full Triangle Pose, individuals can begin by practicing the bent knee variation that helps to gradually understand the movements of the hips and shoulders. It helps to develop strong leg, hip, and back muscles.
Pyramid Pose Hands Down
This difficult movement combines two standing stretches, specifically a revolved triangle pose and a side stretch with hands on the floor. One is a forward bend, and the other is a twisted forward side bend. This variant requires good hamstrings, buttocks, and spinal muscle flexibility. Hence, warming up is essential before practicing this pose.
Precaution and Contradictions
Back or Neck Injuries: Practicing this pose mindfully is crucial if you already have a back or neck ailment. Seek advice from a trained yoga instructor or medical expert before practicing the pose.
High or Low Blood Pressure: It’s best to practice this pose under the supervision of a trained instructor if you have high or low blood pressure or any heart condition. Adjust the position as needed and avoid any abrupt movements.
Hip or Knee Problems: If you experience discomfort when executing the pose, reduce the depth of the stretch or choose a modified pose form.
Migraine: Avoid this posture if you have migraines, as the stretching and movement of the neck may exacerbate headaches.
Digestive Problems: It is not suggested to perform the pose if you are experiencing diarrhea or other stomach issues. Abdominal stretching may aggravate the condition.
Tips for beginners
Avoid Overstretching: Refrain from forcing the body to overextend. Recognize the limitations of the body and extend progressively.
Straight knee: One may feel tempted to bend, but maintaining straight knees is crucial.
Stable Foundation: Place the feet about three to four feet apart to establish a sturdy base. Apply pressure to the inner and outer edges of your front and back feet.
Gradual Progress: It’s okay if, at first, you cannot touch the floor or your foot. Your flexibility will increase with practice if you stretch your side body.
Use props: Use blocks and support to help maintain alignment and balance if necessary. Flexibility will increase with practice as you stretch the body more.
Core Strength: To stay balanced and stable in this pose, activate your core muscles. Lengthen your torso by drawing your navel in toward your spine.
Relax shoulders: Try not to stiffen the shoulders. Let the chest open by rolling the shoulders back down.
Breathe Deeply: This yoga pose requires steady, deep breathing. Allow your breath to help you release any tension while holding the posture.
This pose is beneficial for all levels of yoga practitioners, regardless of experience level. Let it lead you to better physical and mental health by increasing your strength, flexibility, alignment, and balance.

- Vibhuti Pada – Yoga Sutras of Patanjali Chapter 3 - May 24, 2024
- Sadhana Pada – Yoga Sutras of Patanjali Chapter 2 - April 20, 2024
- Samadhi Pada: The First Chapter Of Patanjali Yoga Sutras - April 18, 2024